--
While we have had small success growing a few vegetables in the dirt, we hope to be able to produce more and better vegetables with hydroponics this year. Next year if all goes well with this hydroponics experiment, we hope to convert partially over to aquaponics (fish that provide the nutrients for the plants in a water tank instead of prepackaged nutrients).
Currently there is no budget to do any of this. In this project, as in life, we are praying that God will provide for our needs, and to guide and direct our search for information. Therefore this site is mostly showing you what we are doing on little to no money or previous knowledge about hydroponics. For any success we have, we give thanks to God, and try to hold our pride in check. For the failures we also give thanks, as we learn what does not work and can apply that knowledge to new tasks.
The first attempt to do anything as a hydroponics set up was using some old plastic storage boxes, water, some miracle grow (MG), a small fountain pump and flexible line that is ¼ “ diameter to fit over the pump. In the media tray for that system I put in gravel from our driveway as the supporting plant media.
Twelve days later, the 1 tomato plant and 3 cucumber plants are still alive, but they are not thriving or growing much. This small experiment is on a timer that turns on the pump so that it runs for 15 minutes, then the timer is set to be off for 15 minutes during the day time. Night time setting is set to run the pump for 15 minutes, once per hour.
So I went looking and digging around to see what else I could come up with for a bigger and hopefully better system….
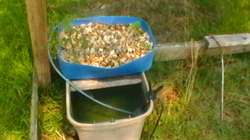
Both the large and small hydroponics experiments we are doing are flood and drain systems.
Both the large and small hydroponics experiments we are doing are flood and drain systems.
--
So far I have recovered an old plastic tote tank that has been in the barn out back for the past several years. The exact size of the tank is unknown, but I assume it is no smaller than 275 gallons. I hauled the tote up to the house and proceeded to cut it into the required elements I could use., which is the media and plant tray section and the square base as the foundation.
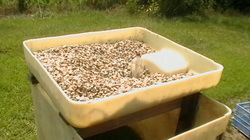
The walls of the box area were reinforced with a bit of lumber as the weight of the gravel alone in the media tray is close to 500 pounds, not including the water. We ended up buying three 50 pound bags of gravel to finish off the media tray, as we needed to leave some gravel in the driveway!
The walls of the box area were reinforced with a bit of lumber as the weight of the gravel alone in the media tray is close to 500 pounds, not including the water. We ended up buying three 50 pound bags of gravel to finish off the media tray, as we needed to leave some gravel in the driveway!
--
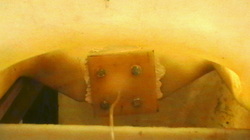
Since the top of the tote had a hole in it, I had to fashion a seal for it, so I cut out a square piece from the door and applied some caulking and bolted that piece over the hole to seal it. I drilled a small hole to test how fast it would drain using a small aquarium air line. Not nearly fast enough of a drain though, so I drilled a hole and put ¾” pvc through near the middle of the media tray, which is sealed using a rubber O ring and threaded pvc fittings. The ¾” pvc pipe combined with a plastic bottle made my first bell siphon, which works quite well to drain water, or nutrient solution down into the main tank.
--
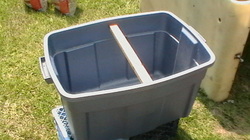
Currently the main tank is a 28 gallon plastic storage bin that is reinforced with a small board and some screws in near the top to prevent excessive bowing when filled with liquid. The media tray can hold approximately 10 gallons of water at the full flood stage along with the gravel.
|
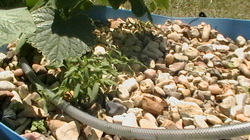
The following images were recorded on June 17 2011
Cucumber plant overshadowing some beafsteak tomato sprouts. The seeds for these tomatoes have been in a freezer for over 3 years. I was very shocked to see so many were still viable seeds. Hence the over crowding. Many of these will be transplanted to a larger grow bed in a week. |
 |
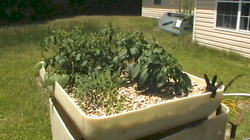
June 17 2011
Shot of the large grow bed containing 8 green pepper, 8 celebrity tomato, 3 cucumber, 4 sweet pea plants that were transplanted from soil pots to the gravel grow bed on June 10.
Shot of the large grow bed containing 8 green pepper, 8 celebrity tomato, 3 cucumber, 4 sweet pea plants that were transplanted from soil pots to the gravel grow bed on June 10.
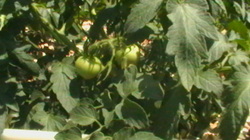
Image close up of the celebrity tomatoes forming up nicely.
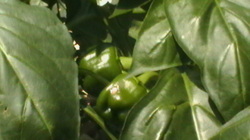
Close up image of the green bell peppers also developing nicely.
NUTRIENT MIX
(Note: saved here for our use. Use this formula at your own risk.)
Epsom Salt:
16 Teaspoons into 1 gallon water. THEN 1 cup of that mixture per 5 gallons of Hydroponic tank water.
5-11-26 Fert:
64 teaspoons per gallon of water. THEN 1 cup of that mixture per 5 gallons of Hydroponic tank water.
Calcium Nitrate:
32 teaspoons per gallon of water. THEN 1 cup of that mixture per 5 gallons of Hydroponic tank water.
1 Gallon = 16 Cups
1 Cup = 8 oz = 16 Tbsp = 48 Tsp
3/4 Cup = 6 oz = 12 Tbsp = 36 Tsp
2/3 Cup = 5 oz = 11 Tbsp = 32 Tsp
1/2 Cup = 4 oz = 8 Tbsp = 24 Tsp
1/3 Cup = 3 oz = 5 Tbsp = 16 Tsp
1/4 Cup = 2 oz = 4 Tbsp = 12 Tsp
1/8 Cup = 1 oz = 2 Tbsp = 6 Tsp
1/16 Cup = .5 oz = 1 Tbsp = 3 Tsp
Do NOT use bleach to kill off algae growth. Bleach WILL kill your plants! (I tried this with bleach and lost several plants.)
Acclimate the temperature of new water. Do not put in new water that has a temperature difference greater than 10 degrees F, or it will shock your plants and they will get damaged! (I have done this also and the plants showed further damage, leaf curls.)
--
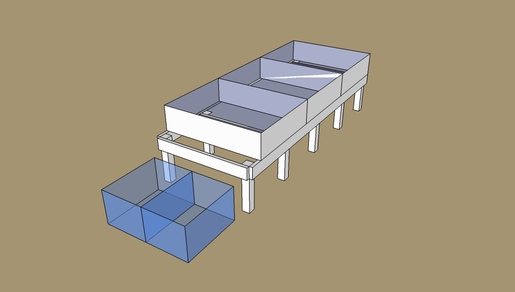
A new plan for a better, more stable setup using the tubs cut out from plastic totes. The wood frame will be made from treated 4x4 and 2x6 lumber. The frame will be 22 inches tall, 10 feet long, and 4 feet wide. The frame will also have plywood covering most of the top.
The white tote sections are 48 inches by 38 inches and 12 inches deep. The legs are spaced at 30 inches apart.
The two semi transparent blue boxes represent smaller storage totes that will hold water/nutrient mixture.
The white tote sections are 48 inches by 38 inches and 12 inches deep. The legs are spaced at 30 inches apart.
The two semi transparent blue boxes represent smaller storage totes that will hold water/nutrient mixture.
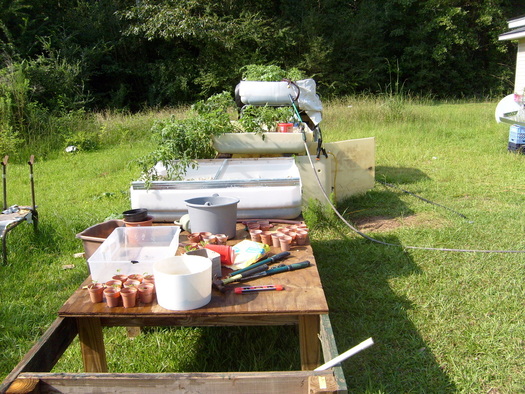
Update August-1-2011
Expanding the system a little at a time. Built the wooded bench / table as described above and moved one grow bed onto it so far. Using the remaining space as a work area and small nursery for plants to mature a bit in small soil pots before transplanting into the gravel grow bed.
Expanding the system a little at a time. Built the wooded bench / table as described above and moved one grow bed onto it so far. Using the remaining space as a work area and small nursery for plants to mature a bit in small soil pots before transplanting into the gravel grow bed.
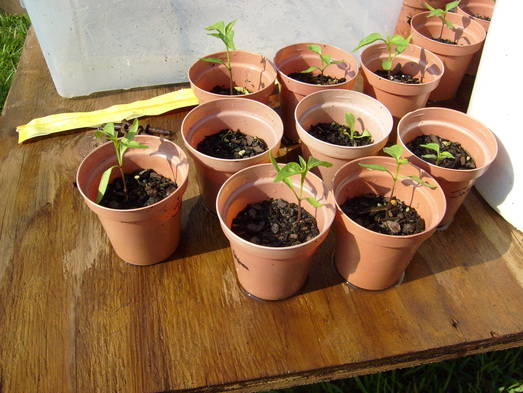
Some young Jalapeno plants. These were sprouted on paper inside a closed plastic container, then transplanted to these small pots.
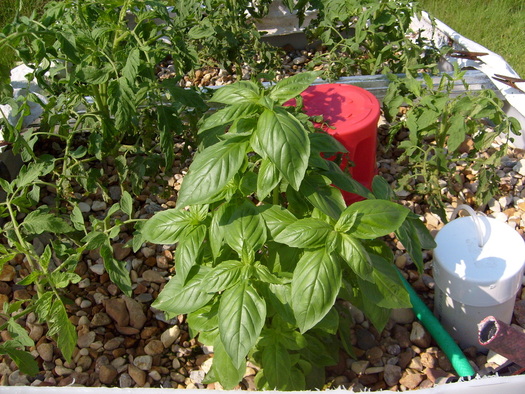
A Basil plant among several Beefsteak Tomato plants. August-1-2011. A white pvc Bell siphon is visible in the lower right. The red plastic coffee can shades the area where the water flows into the grow bed. Shading that area should slow down algae growth.

Short update. (January 2012.) Overall the vegetables produced very little in this system for this year. Very disappointing. However, we did learn some and we believe the water temperature was a big factor. We used only 28 gallon plastic totes for the main tank and the water temperature got as high as 92 degrees (F). A larger 250 plus gallon tank in the shade should help keep a more stable and consistant water temperature for next year. Also we probably had too many plants crowded in each grow bed.
