VAWT - Vertical Axis Wind Turbines
HAWT- Horizontal Axis Wind Turbines
Although this is not directly related to hydroponics, perhaps some day I will use the power produced from wind to run the water pumps, and more.
I have been looking at and studying VAWTS for quite some time now, over two years in fact. One discouraging setback is the cost of buying materials or kits. You can easily spend Thousands of dollars just to get a small basic system running.
So I'm attempting to find materials and methods to build wind turbines the cheapest way possible. One idea I have had is to use corrugated plastic as it is strong and lightweight. In many instances it is free. The old political signs that litter our landscape is just one source of free corrugated plastic. Also PVC pipe or tubing can be free or cheap.
Sadly so far I have not found free or cheap sheet aluminum.
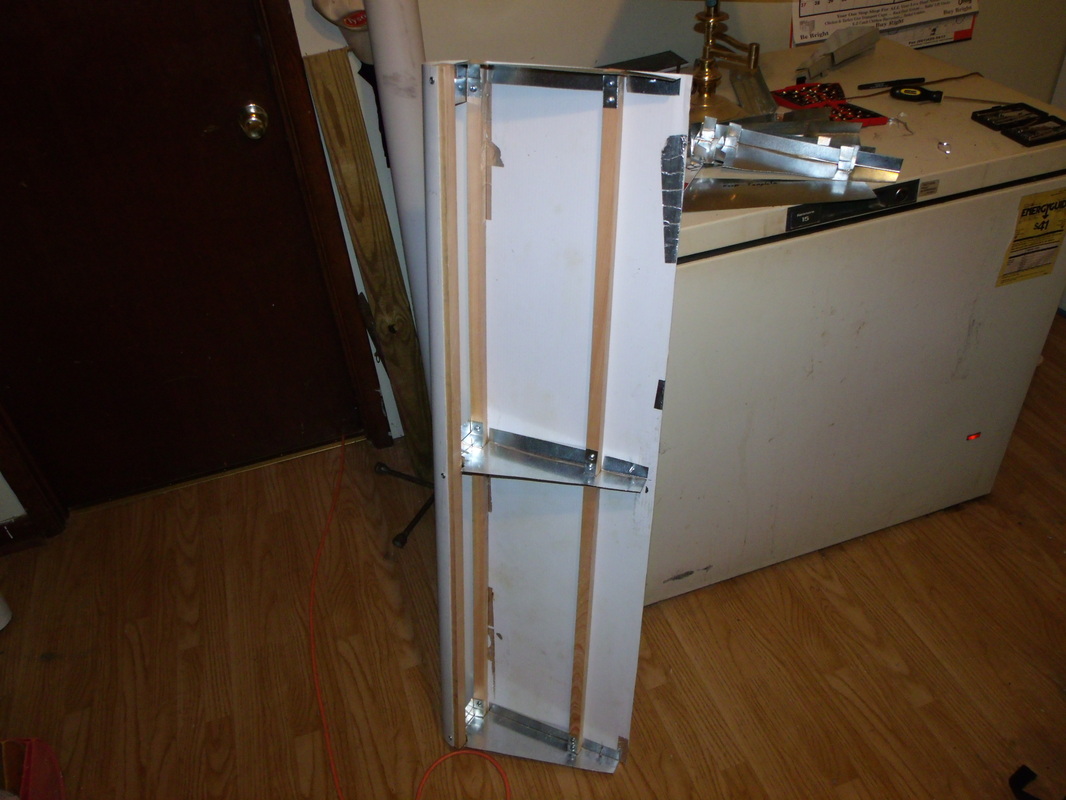
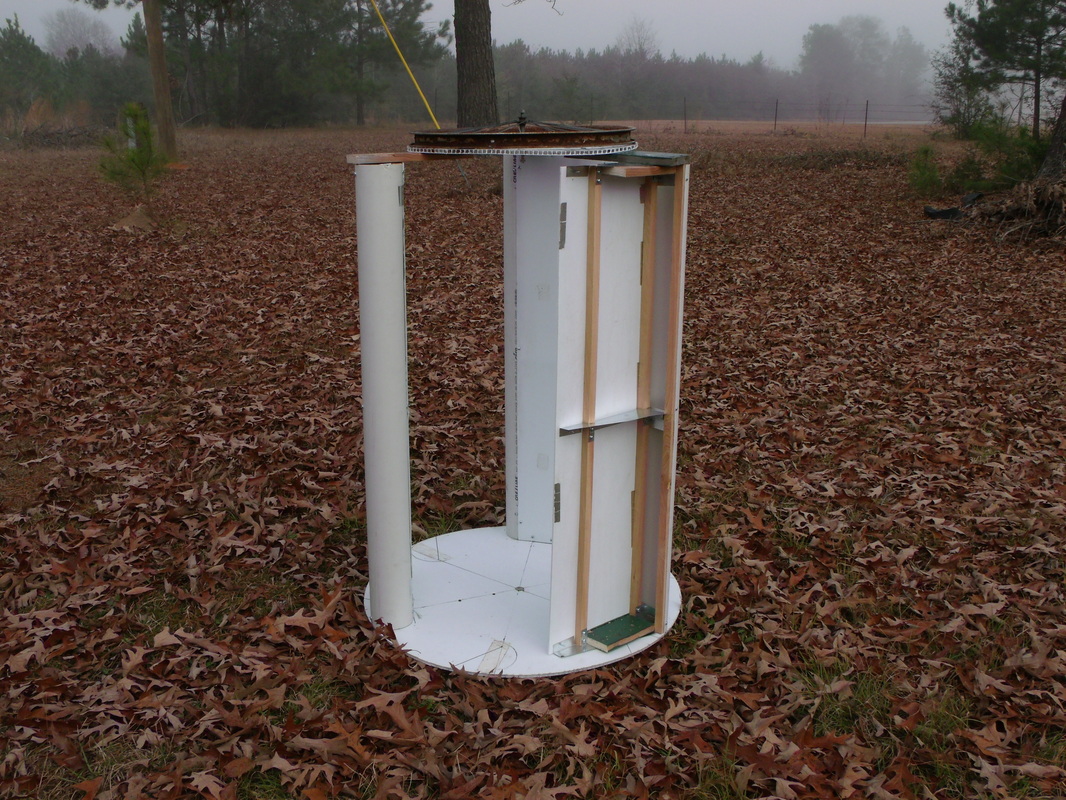
Below are a few images of my first Lenz-II type VAWT, showing just a bit of the building process in the first two images.
I have been looking at and studying VAWTS for quite some time now, over two years in fact. One discouraging setback is the cost of buying materials or kits. You can easily spend Thousands of dollars just to get a small basic system running.
So I'm attempting to find materials and methods to build wind turbines the cheapest way possible. One idea I have had is to use corrugated plastic as it is strong and lightweight. In many instances it is free. The old political signs that litter our landscape is just one source of free corrugated plastic. Also PVC pipe or tubing can be free or cheap.
Sadly so far I have not found free or cheap sheet aluminum.
Below are a few images of my first Lenz-II type VAWT, showing just a bit of the building process in the first two images.

Wind turbine blades rough cut with a Chainsaw.
I came across a site which is a tutorial on how to make wood wind turbine blades with a chainsaw several months ago. With some adjustments to lumber dimensions I adapted the tutorial to fit my needs. I also used a CAD type program called sketchup to lay out my jigs. The original tutorial I found is Here.
My Current HAWT project follows below.
Horizontal Axis Wind Turbine
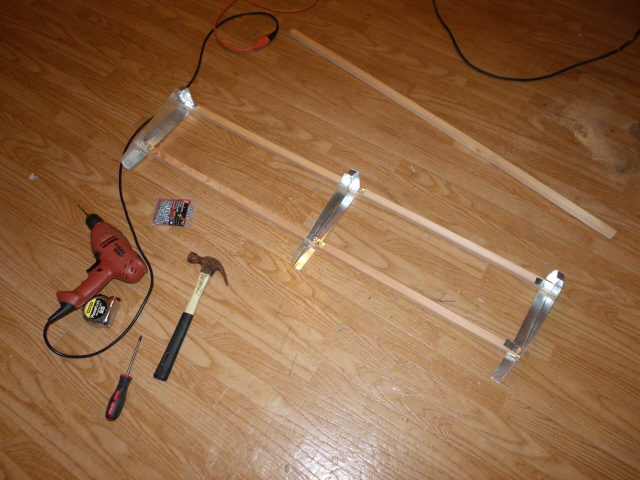
Chainsaw work on jig.
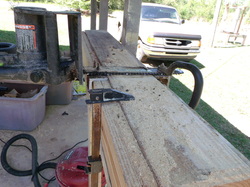
Halfway through the 2x6 board with an electric chainsaw set up to be able to ride the jig side rails. How this is set up with a handle on the end is dangerous, should the chain break. If you attempt to do this, it is at your own peril and responsibility.
Power planer adaption.
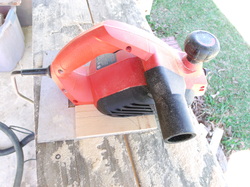
My 3.25" wide Black and Decker power planer. I made an adapter plate out of 1/8" thick aluminum to widen the base to assist in more accuracy planing the windward side of the blade. Notice the wood shim I had to use as the planer sides were not the same depth.
Planer bottom.
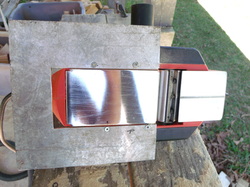
Here is the view of the bottom of the planer showing the mounting screws I installed. The holes are countersunk in the aluminum plate.
On the rails.
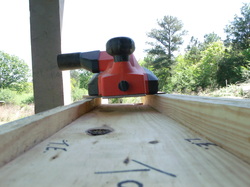
With the wind blade removed, this shows the planer straddling the jig for the wind blade.
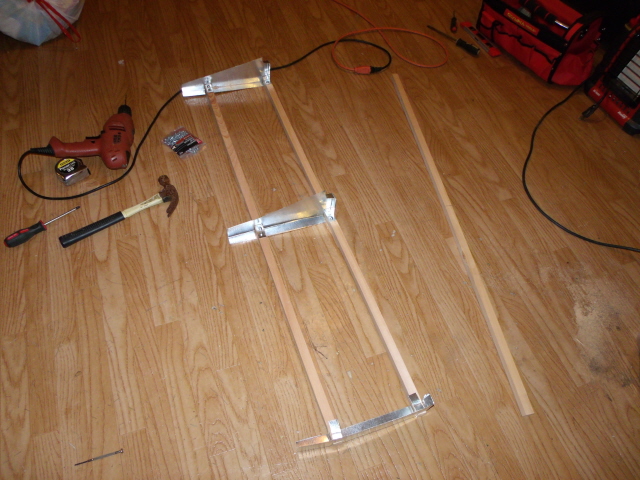
Windward side planed.
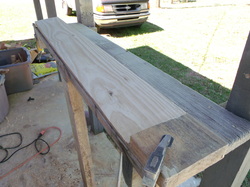
Wind blade removed from jig after planing and a good amount of sanding with the belt sander using 50 and 80 grit sanding belts. Only the wind facing side of the blade has been worked on so far.
Below:
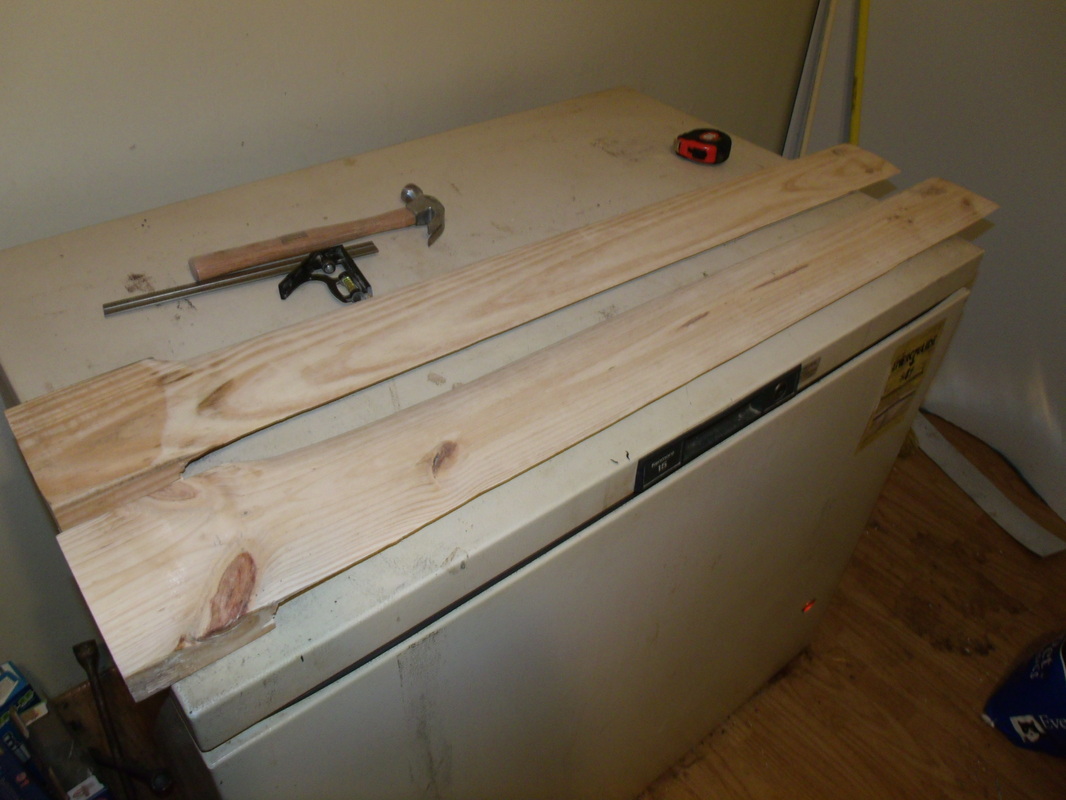
Two practice blades with both sides chainsawed, planed, and sanded. These blades are 4 feet long, 1 1/2 inches thick at the square (hub) end, and 5 1/2 inches wide at the hub end. The tips of the blades are 4 1/2 inches wide. The Angle Of Attack next to the hub is 11 degrees, the AOA at the tip is 3 degrees. These blades are designed to rotate Clockwise when facing the wind.
Two practice blades with both sides chainsawed, planed, and sanded. These blades are 4 feet long, 1 1/2 inches thick at the square (hub) end, and 5 1/2 inches wide at the hub end. The tips of the blades are 4 1/2 inches wide. The Angle Of Attack next to the hub is 11 degrees, the AOA at the tip is 3 degrees. These blades are designed to rotate Clockwise when facing the wind.
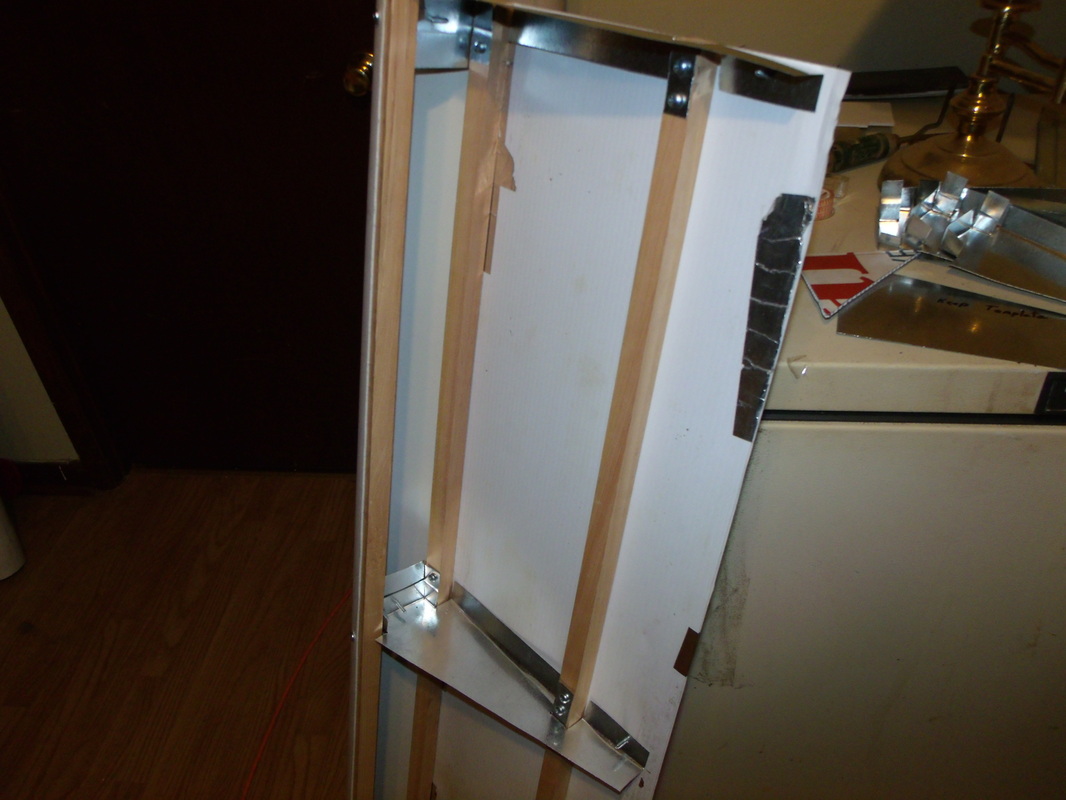
A wing?
Well it's a lot like a wing, with the curved airfoil shown in this image of the tip of the wood turbine blade.
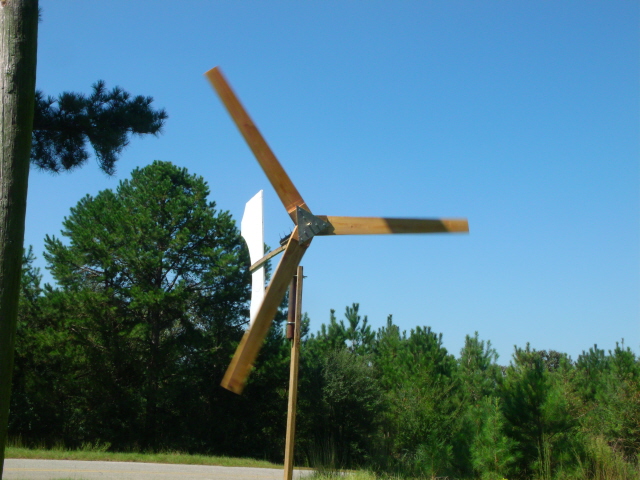
First wind: October 5 2012
After months of off and on work, I got the first chainsaw carved wind turbine up and spinning today. Light breeze from 0 to 5 mph. Actually the blades were rough cut with a chainsaw, then a hand power planer, (shown in images above), then rough sanded with 50 grit sanding belt, then to 80 grit, then finished off with 120 grit sand paper by hand and a block.
Weatherproofing is 4 heavy applications of linseed oil. You can see the honey color in the picture on the right below. We'll see how well that holds up.
Weatherproofing is 4 heavy applications of linseed oil. You can see the honey color in the picture on the right below. We'll see how well that holds up.